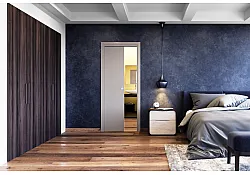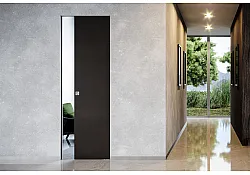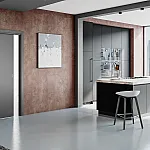
A sliding door that disappears completely into the wall is an excellent solution if you want to save space and create a clean, modern interior. Especially in new-build projects and renovations, a metal stud wall is often used for this purpose. But how do you install a sliding door in a metal stud wall? And what should you consider when constructing the wall?
In this article, we explain how to install a pocket sliding door system in a metal stud wall and highlight the most important points to consider.
Can you install a sliding door in a metal stud wall?
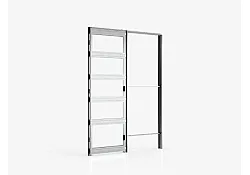
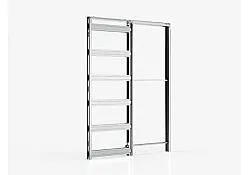
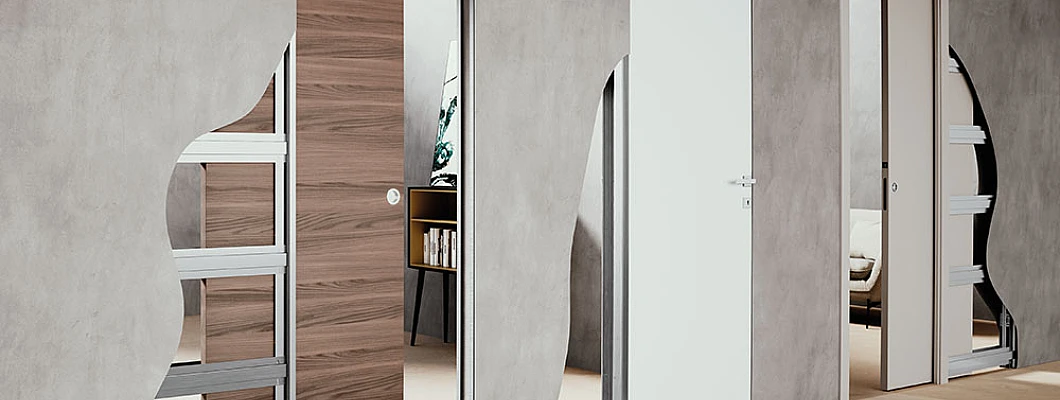
Yes. A metal stud wall is actually very suitable for installing a pocket sliding door. With this type of sliding door, the door leaf does not slide along the outside of the wall, but disappears into a special cassette frame that becomes part of the wall. Naturally, we offer a wide range of systems designed specifically for this purpose.
The pocket door frame essentially replaces part of the standard metal stud framework. Once the sliding door system has been installed, the wall can be finished with plasterboard on both sides.
The result is a normal partition wall into which the sliding door can disappear completely.
What do you need?
For a sliding door in a metal stud wall, you need a pocket door system suitable for plasterboard walls.
Such a system generally consists of:
- a metal cassette into which the door disappears;
- a top track;
- rollers for the door leaf;
- a top structure and closing jamb;
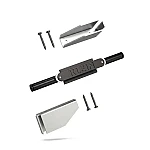
- mounting hardware;
- a floor guide.
The cassette is integrated into the metal stud construction. It is therefore important to select the correct system beforehand, taking into account factors such as the dimensions and weight of the door.
Step 1: determine the correct door size
Before constructing the metal stud wall, you need to know which door size will be installed.
With a conventional hinged door, the wall opening only needs to accommodate the door frame and door. With a pocket sliding door, additional space is required for the cassette into which the door slides.
For a single sliding door, you should therefore roughly allow for a total construction width of slightly more than twice the width of the door leaf.
A 930 mm wide door, for example, requires considerably more available wall width than just the doorway itself.
Always check the exact installation dimensions of your chosen sliding door system before installing the metal stud profiles. You can find these dimensions in the downloads provided with our products, or call us on +31 (0)85 489 6633 for a quick answer to your questions about dimensions.
Step 2: build the metal stud frame
You can now start constructing the basic metal stud wall.
Install the floor and ceiling profiles followed by the vertical studs. Leave sufficient space at the position of the sliding door for the complete pocket door frame.
Do not first construct a conventional metal stud frame in this area that will later have to be removed. The frame of the sliding door system itself forms an important part of the construction around the doorway.
Pay close attention to the dimensions during this stage. A difference of just a few millimetres at the bottom of the construction can already cause problems at the top.
When leaving space for the system, remember that it must be installed at the finished floor level of the room.
Step 3: install the pocket door frame
The pocket door frame can now be installed between the metal stud construction.
Make sure the system:
- is perfectly level;
- is installed perfectly vertical;
- is positioned at the correct height;
- is securely fixed to the surrounding construction.
This is one of the most important parts of the installation. If the frame is not level or square, the door may not run smoothly or may not close correctly later.
Always check the dimensions and alignment before closing the wall.
Step 4: install the cassette and check its operation
The pocket door cassette can now be installed. After positioning the cassette, follow the installation instructions provided with the product.
If you have ordered a complete box rather than a kit, install the complete unit in one piece at the correct height relative to the finished floor.
Before permanently finishing the wall, check that all components have been installed correctly and that the rollers can move freely through the track.
If you have selected a soft-close system, this must also be correctly installed and adjusted, both within the system and on the door itself.
One of the major advantages of a high-quality pocket door system is that important moving components remain accessible for maintenance or replacement, even after the wall has been finished.
Fortunately, this is always the case with our systems!
Step 5: finish the metal stud wall with plasterboard
Is the complete frame correctly positioned? The metal stud wall can now be finished.
The plasterboard is fixed to both the metal stud construction and the appropriate sections of the pocket door frame.
There is one particularly important point to remember:
Never use screws that are so long that they protrude into the space through which the door leaf slides.
This is why our systems always include short screws to prevent this from happening.
A protruding screw can damage the door as soon as it slides into the cassette.
Once the plasterboard has been installed, the joints can be finished and the wall can be plastered, painted or finished in another way.
Step 6: install the door leaf
Once the wall has been finished, the door leaf can be installed.
The mounting brackets are attached to the top of the door leaf and then connected to the rollers. At the bottom, a floor guide ensures that the door remains properly aligned while opening and closing.
The door can then be adjusted to the correct height and position.
Check that:
- the door opens and closes smoothly;
- the door leaf does not touch the cassette;
- the door hangs straight;
- the door can slide completely into the wall;
- the door aligns correctly when closed.
What wall thickness do you need?
The required wall thickness depends on the pocket door system you choose.
A pocket sliding door requires more space than just the thickness of the door leaf. The wall also needs to accommodate the cassette, supporting structure and wall finish.
Pocket door systems are therefore available for different finished wall thicknesses. As standard, we offer systems for 100 mm and 125 mm finished wall thicknesses.
Would you like to use a thicker wall? Please contact us at klantenservice@novitaplus.nl or call +31 (0)85 489 6633 to discuss the possibilities.
We can also provide solutions for 150 mm and 200 mm wall thicknesses. Alternatively, we can advise you on how to increase the thickness of an existing system to achieve the required finished wall thickness.
Ideally, determine the required wall thickness before constructing the metal stud wall. This prevents problems with the profiles and pocket door system not matching correctly.
Single or double sliding door in a metal stud wall
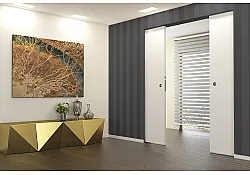
In addition to a single sliding door, it is also possible to install a double sliding door in a metal stud wall.
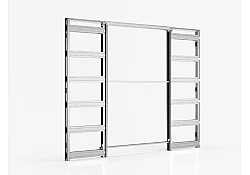
With a double system, a door leaf slides into the wall on either side of the opening. This allows you to create a much wider passage without requiring the space needed for two conventional hinged doors.
A double sliding door requires two pocket door cassettes that are positioned precisely opposite each other. You can find these in our range as Doppio systems.
For the Absolute frameless systems, double versions can be ordered directly. Our EvoKit systems can be supplied from stock in combination with a connecting kit.
Can an existing metal stud wall be modified?
Yes, but this is considerably more complicated than installing a pocket door while constructing the wall.
With an existing metal stud wall, a large section of the plasterboard and the underlying framework must be removed to create sufficient space for the cassette.
You should also check whether there are any pipes, electrical cables or other installations running through this part of the wall.
If you already know during a renovation that you want to install a pocket sliding door, it is almost always easier to take this into account before constructing the metal stud wall.
Consider electrical installations in the wall
One point that is easily overlooked is the position of electrical sockets and switches.
Space is limited where the door disappears into the cassette. This means that electrical boxes, cables or other installations cannot simply be installed in this part of the wall.
There is, however, a system specifically designed to provide space for this: the Absolute Energy Singolo.
Before constructing the wall, determine:
- where the cassette will be positioned;
- where switches and electrical sockets need to be installed;
- where electrical cables will run through the wall.
This prevents problems once the wall has been closed.
Creating a clean finish with a sliding door in a metal stud wall
One of the major advantages of a pocket sliding door is that almost the entire sliding mechanism is hidden from view.
With traditional pocket door systems, a finishing trim or door frame usually remains visible around the opening. However, there are also frameless pocket door systems where the plasterboard wall continues almost seamlessly up to the doorway.
This creates an exceptionally clean and minimalist appearance without a traditional visible door frame.
These are the Absolute systems in our range.
Want to hang something on the wall?
Hanging objects on a plasterboard wall can already be challenging. Special plasterboard fixings can provide a stronger fixing point, but in combination with a pocket door cassette this is not always ideal. There is a risk of drilling or screwing too close to the door.
If you want to be able to mount objects on this part of the wall, we recommend choosing a 125 mm wall thickness and installing a wooden OSB board behind the plasterboard.
This makes the wall considerably stronger and immediately provides additional material into which you can safely screw or nail.
Definitely worth considering when planning your wall!
Choose the system before building the wall
The most important tip when installing a sliding door in a metal stud wall is actually very simple:
Choose the sliding door system first and build the wall afterwards.
The dimensions of the pocket door frame, required wall thickness, clear opening and position of the metal stud profiles all depend on the system you choose.
Using the correct technical drawings and installation dimensions from the start prevents the wall from having to be modified later.
Installing a sliding door in a metal stud wall
A pocket sliding door and a metal stud wall are an excellent combination. The pocket door frame is integrated into the metal stud construction while the wall is being built and is subsequently finished with plasterboard together with the rest of the wall.
Good preparation and accurate measurements are essential for the best result. Select your sliding door system before constructing the wall, check the required wall thickness and make sure that the frame is installed perfectly level and vertical.
The result is a space-saving sliding door that disappears completely into the wall, with almost the entire sliding mechanism hidden from view.